
This chilled peanut butter and chocolate pie is everything a no-bake dessert should be: indulgent, creamy, and deceptively simple. Imagine the richness of a peanut butter cheesecake, but with none of the baking fuss. The buttery graham cracker crust provides the perfect base, while the cool, velvety filling bursts with nutty flavor and bits of chopped Reese’s cups. Whether you’re hosting a party, making a weeknight treat, or just craving a nostalgic flavor combo, this recipe delivers bold taste with minimal effort. No oven, no complicated steps—just cold, creamy satisfaction.
Why This No-Bake Peanut Butter Pie Stands Out
Many no-bake pies can lean too sweet or too airy, but this one strikes a better balance. The combination of cream cheese and creamy peanut butter creates a mousse-like filling with substance, while chopped Reese’s add texture and flavor pops throughout. It’s a pie that doesn’t try to be subtle—and that’s exactly the point.
It also scales well for gatherings and holds up beautifully in the fridge or freezer, making it perfect for prep-ahead entertaining.
Ingredients You’ll Need
Before you begin, gather these key components. Each plays a role in making this dessert both foolproof and delicious.
- Graham Cracker Crumbs (2 cups): The base of the crust. Use pre-crushed or blitz whole crackers in a food processor.
- Melted Butter (½ cup): Binds the crumbs and gives the crust a rich, toasty flavor.
- Cream Cheese (16 oz, softened): Adds tang and structure to the filling.
- Powdered Sugar (½ cup): Sweetens the base without grittiness.
- Creamy Peanut Butter (1 cup): Go for the classic shelf-stable variety for consistency—natural peanut butters tend to separate.
- Whipped Topping (8 oz, thawed): Lightens the filling and makes it airy without whipping your own cream.
- Mini Peanut Butter Cups (15 oz, chopped): The showstopping mix-in and topping. You can reserve a few whole for garnish.
Making the Crust
This recipe starts with a classic graham cracker crust, but its simplicity is part of the appeal. You don’t even need to bake it—just press, freeze, and fill.
Step-by-step:
- In a bowl, mix graham cracker crumbs with melted butter until the texture resembles wet sand.
- Firmly press the mixture into the bottom and sides of a deep 9-inch pie plate. Use the flat bottom of a glass to compress it evenly.
- Freeze the crust for at least 30 minutes. This firms it up so it doesn’t crumble when the filling is added.
Pro Tip: If you’re short on graham crumbs, substitute with crushed chocolate cookies or digestive biscuits for a twist.
Preparing the Filling
The filling combines a few pantry staples into something that tastes bakery-worthy. It’s rich yet smooth, with bits of Reese’s scattered throughout for surprise texture.

- Use an electric mixer to beat softened cream cheese and powdered sugar until smooth. Scrape the bowl to ensure no lumps remain.
- Blend in the peanut butter. The mixture should be thick and uniform.
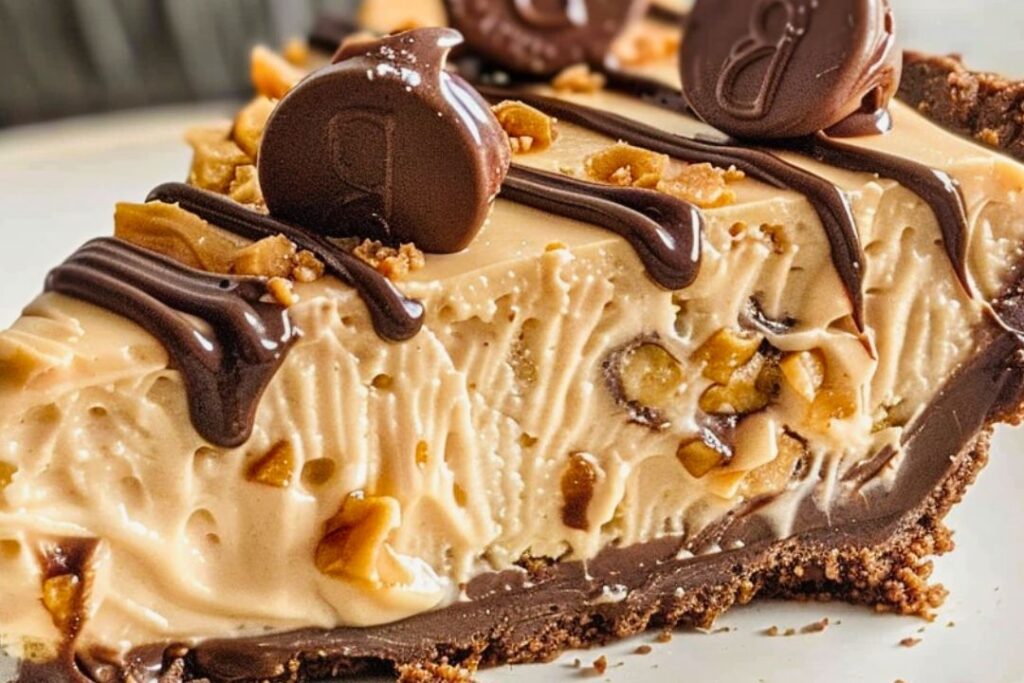
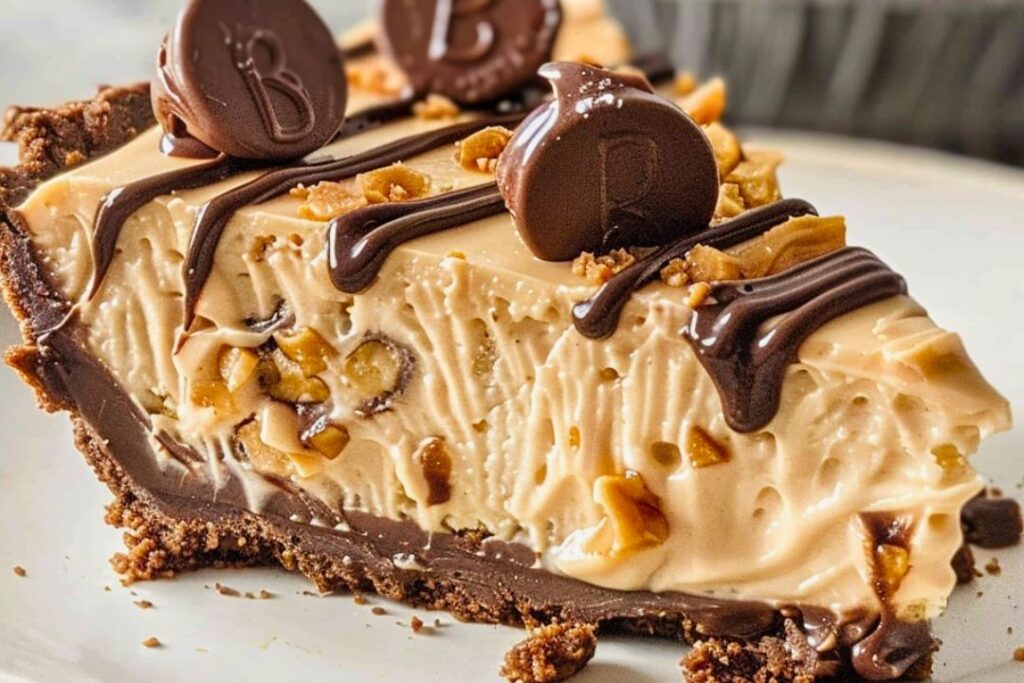
- Fold in about ½ cup of the chopped peanut butter cups. This adds flavor and texture to the body of the pie.
- Add the whipped topping gently, folding rather than stirring to keep the filling light.
Tip: Make sure the cream cheese is fully softened to room temperature—this prevents lumps and ensures a silky texture.
Assembling the Pie
Once the crust is set and the filling is ready, it’s time to bring the two together. Here’s how to layer it for the best texture and visual appeal.
- Spread the peanut butter mixture into the frozen crust using a spatula. Smooth the top.
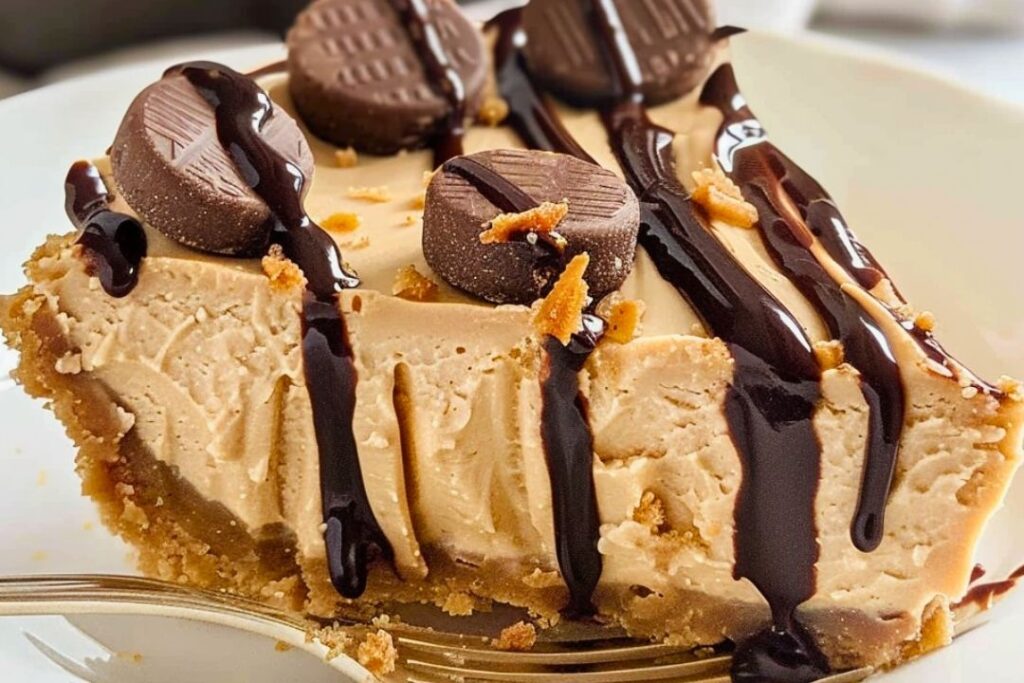
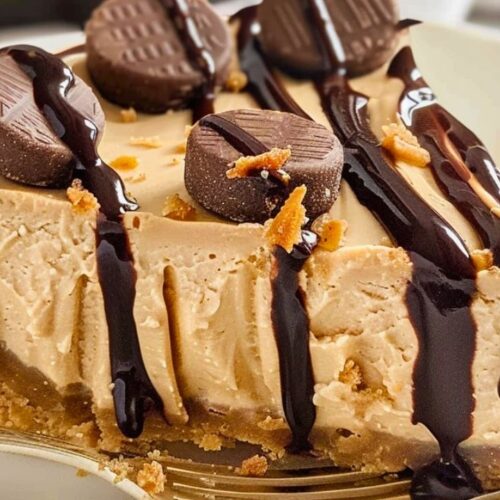
- Sprinkle the remaining chopped peanut butter cups evenly across the surface. Feel free to add a few whole ones in the center for visual impact.
- Optional extras: drizzle with chocolate syrup, scatter chopped salted peanuts for crunch, or dollop with extra whipped topping.
Chill or Freeze?

You can either refrigerate or freeze the finished pie depending on your schedule.
- For a soft-set pie: Chill in the refrigerator for 2–3 hours before serving.
- For a firmer, ice-cream-style texture: Freeze for at least 4 hours, then allow to soften slightly at room temp before slicing.
Leftovers should be kept cold. In the fridge, it lasts up to 5 days. For longer storage, freeze slices wrapped in foil and placed in an airtight container.
Variations to Try
This base recipe is versatile enough to adapt. Here are a few creative riffs:
- Chocolate Crust: Swap graham crackers for crushed Oreos for an extra chocolate hit.
- Nut-Free Option: Use cookie butter instead of peanut butter and omit the peanut butter cups. Try chocolate chips or chopped toffee bars instead.
- Frozen Layered Version: Freeze the crust for 15 minutes, then layer half the filling, sprinkle chopped candy, then add the rest of the filling for a layered effect.
Serving Suggestions
This dessert is indulgent, so small slices go a long way. Serve it with:
- A drizzle of warm chocolate or caramel sauce
- Lightly sweetened whipped cream
- Crushed pretzels or sea salt flakes for contrast
For presentation, consider using a sharp knife dipped in hot water for cleaner slices. If serving for a party, garnish each slice with a mini Reese’s cup.
Make-Ahead and Storage
This pie is an ideal make-ahead dessert. The flavor improves slightly after chilling, and the texture stays firm yet creamy for days.
- Refrigerator: Store covered for up to 5 days.
- Freezer: Freeze whole or in slices for up to 1 month. Thaw slices in the fridge overnight or at room temperature for 30–45 minutes before serving.
Avoid repeated thawing and refreezing to maintain the best texture.
Final Thoughts
This no-bake peanut butter pie with cream cheese and Reese’s is a dessert with broad appeal—simple enough for weeknights, rich enough for holidays. With its layered textures and cool, creamy filling, it delivers maximum flavor for minimal work. Whether you’re looking to impress guests or just treat yourself, this recipe gets the job done.
And because it relies on common pantry ingredients, there’s a good chance you can whip it up without a last-minute grocery run. Keep a box of graham crackers and a stash of mini peanut butter cups handy—once you’ve made it once, you’ll want to revisit it often.
No-Bake Peanut Butter Cup Pie
Ingredients
Graham Cracker Crust
- 2 cups graham cracker crumbs
- 0.5 cup unsalted butter melted
Peanut Butter Pie Filling
- 16 ounces cream cheese softened (2 blocks)
- 0.5 cup powdered sugar
- 1 cup creamy peanut butter regular type
- 8 ounces whipped topping thawed (Cool Whip or similar)
- 15 ounces mini peanut butter cups chopped, divided
Instructions
Graham Cracker Crust
- In a bowl, combine graham cracker crumbs and melted butter until mixture resembles wet sand. Press firmly into the bottom and up the sides of a 9-inch deep dish pie plate. Freeze for 30 minutes to set before adding the filling.
Peanut Butter Pie Filling
- Chop mini peanut butter cups, reserving about ½ cup for folding into the filling and the remainder for topping. In a large bowl, beat softened cream cheese and powdered sugar with an electric mixer until smooth. Add peanut butter and continue mixing until fully combined and lump-free. Fold in ½ cup chopped peanut butter cups gently. Fold in the thawed whipped topping until evenly incorporated.
Final Steps
- Remove crust from freezer. Spread the prepared filling evenly into the chilled crust. Sprinkle remaining chopped peanut butter cups evenly on top. Optionally, garnish with whole peanut butter cups or drizzle with chocolate syrup as desired.
- Refrigerate the assembled pie for at least 2–3 hours before serving for a soft set. Alternatively, freeze for at least 4 hours for a firmer, ice-cream-like texture. Store leftovers covered in the refrigerator up to 5 days or freeze slices for up to one month.
Notes
- Use a 9-inch deep dish pie plate for best results.
- Make sure the cream cheese is fully softened to avoid lumps.
- You can substitute the graham cracker crust with crushed chocolate cookies for variation.
- Store leftovers covered in the fridge up to 5 days or freeze for longer storage.
Leave a Reply